
Onboarding
This page covers the full registration flow for both compute (GPU) and storage (NFS) machines. The steps are identical — the only difference is which button you click on the Add Machine screen.
1. Sign up
Section titled “1. Sign up”Create an account at console.meshive.ai and verify your email.
2. Switch to Host mode
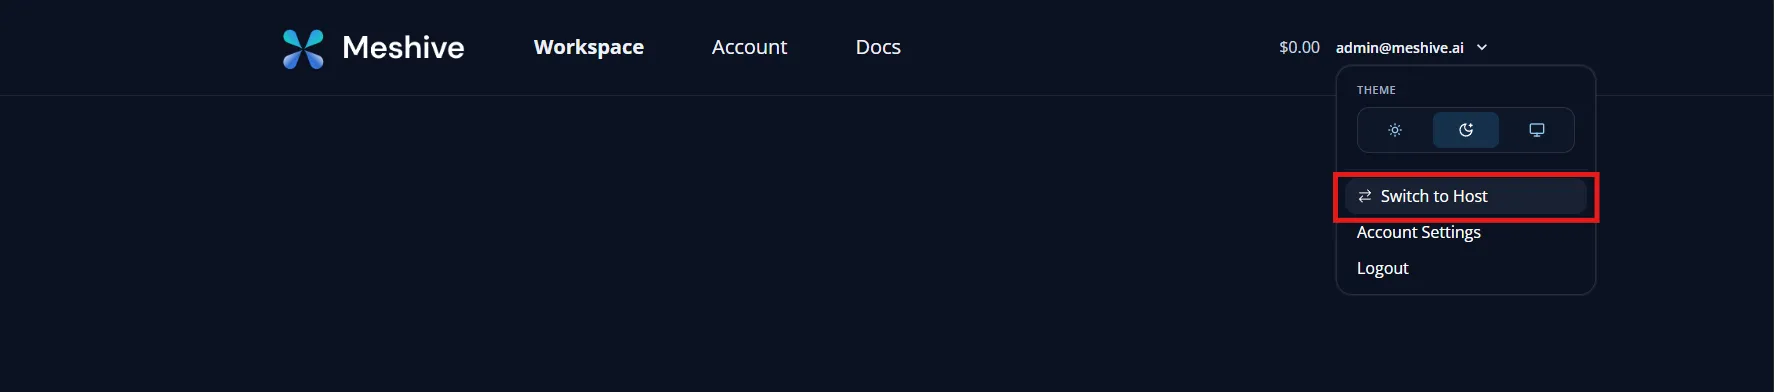
Section titled “2. Switch to Host mode”If you signed up as a Client, open the user menu in the top right and click Switch to Host. The dashboard reloads into the Host console.
3. Add Machine — Compute Node or Storage Node
Section titled “3. Add Machine — Compute Node or Storage Node”From the Host dashboard, click Add Machine and pick the node type:
- Compute Node — a GPU machine that will rent out GPU pods (and CPU pods on the side).
- Storage Node — an NFS-backed storage host.
The rest of this page is the same regardless of which you pick. Storage nodes do have a few extra disk requirements — see Hardware & Network → Storage Node.
4. Run the install script
Section titled “4. Run the install script”The console shows a one-line install command containing a registration code that expires in 3 minutes. Copy it, SSH into your prepared host, and run it as root (or with sudo) — you don’t need to know what’s inside; the copy-and-paste is the whole interface.
The script’s job is small and focused: join the Tailscale VPN and install the Meshive agent. Everything else (Kubernetes join, GPU driver pinning, NFS export configuration, …) is then negotiated between the agent and Meshive’s control plane.
5. Watch progress
Section titled “5. Watch progress”Back in the console, the machine appears with a live status that walks through the setup pipeline (e.g. 1/23 → 2/23 → …). You can close the page; the agent continues independently.
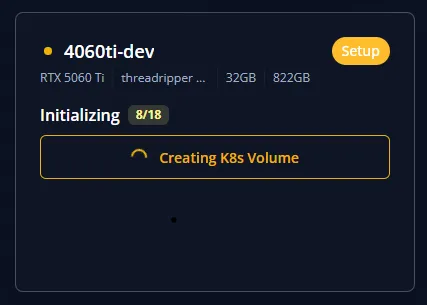
One of those steps is the initial stress test, which validates GPU, CPU, RAM, disk, and network behavior. If a thermal throttle persists or the test fails outright, you’ll need to adjust the hardware (cooling, PSU, seating, cabling) and retry before the machine can move on.
6. Unlisted → Listing
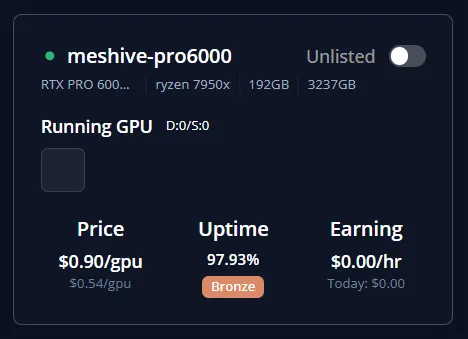
Section titled “6. Unlisted → Listing”Once every step passes, the machine enters the Unlisted state. It is fully onboarded but not yet rentable — this gives you time to review pricing, policies, and any custom settings.
When you are ready, click Listing to add the machine to the marketplace. Pods will start flowing in shortly.
Next step: read SSH & Monitoring so you know how to keep an eye on your machine.